- 1. RabbitMQ Server(Broker) 설정
- 2. Spring Initializr를 통해 프로젝트 생성
- 3. RabbitMQ Message Receiver 구현
- 4. Listener 등록 및 Message 전송
- 5. 메세지 전송
- 6. 애플리케이션 실행 구조
- 7. 결과
이전 RabbitMQ 개념에 정리한 것에 이어, Spring.io의 docs를 참고하여 실습한 내용을 정리해 보았습니다. 실습에 사용된 코드는 Github에서 확인할 수 있습니다.
실습은 메세지를 발행하고 수신하는 RabbitMQ AMQP Server를 설정하고, RabbitMQ 서버와 연동된 Spring Boot 애플리케이션을 구현하는 내용으로 구성되어 있습니다.
필요한 것들
- 15분
- 최애 IDE (난 IntelliJ)
- JDK 11 이상
- Gradle 또는 Maven
- Rabbit server (Broker 역할)
1. RabbitMQ Server(Broker) 설정
메세징 애플리케이션을 빌드하기 전에 메세지를 발신하고 수신하는 서버를 세팅해야 합니다.
RabbitMQ는 AMQP 서버인데, https://www.rabbitmq.com/download.html 에서 무료로 다운로드가 가능하며 Mac에선 Homebrew를 통한 다운로드도 가능합니다.
brew install rabbitmq
아래 명령어를 통해 Default Setting으로 실행합니다.
brew services start rabbitmq
brew services stop rabbitmq
brew services restart rabbitmq
접속
http://localhost:15672
Username : guest (Default Admin)
Password : guest
또는 로컬에 도커가 설치되어 있을 경우, Docker Compose 를 통해 빠르게 RabbitMQ 서버를 시작할 수 있습니다. 프로젝트의 루트 폴더에 아래의 docker-compose.yml 을 생성후 docer-compose up 명령어를 통해 컨테이너에서 실행시키면 됩니다.
rabbitmq:
  image: rabbitmq:management
  ports:
    - "5672:5672"
    - "15672:15672"
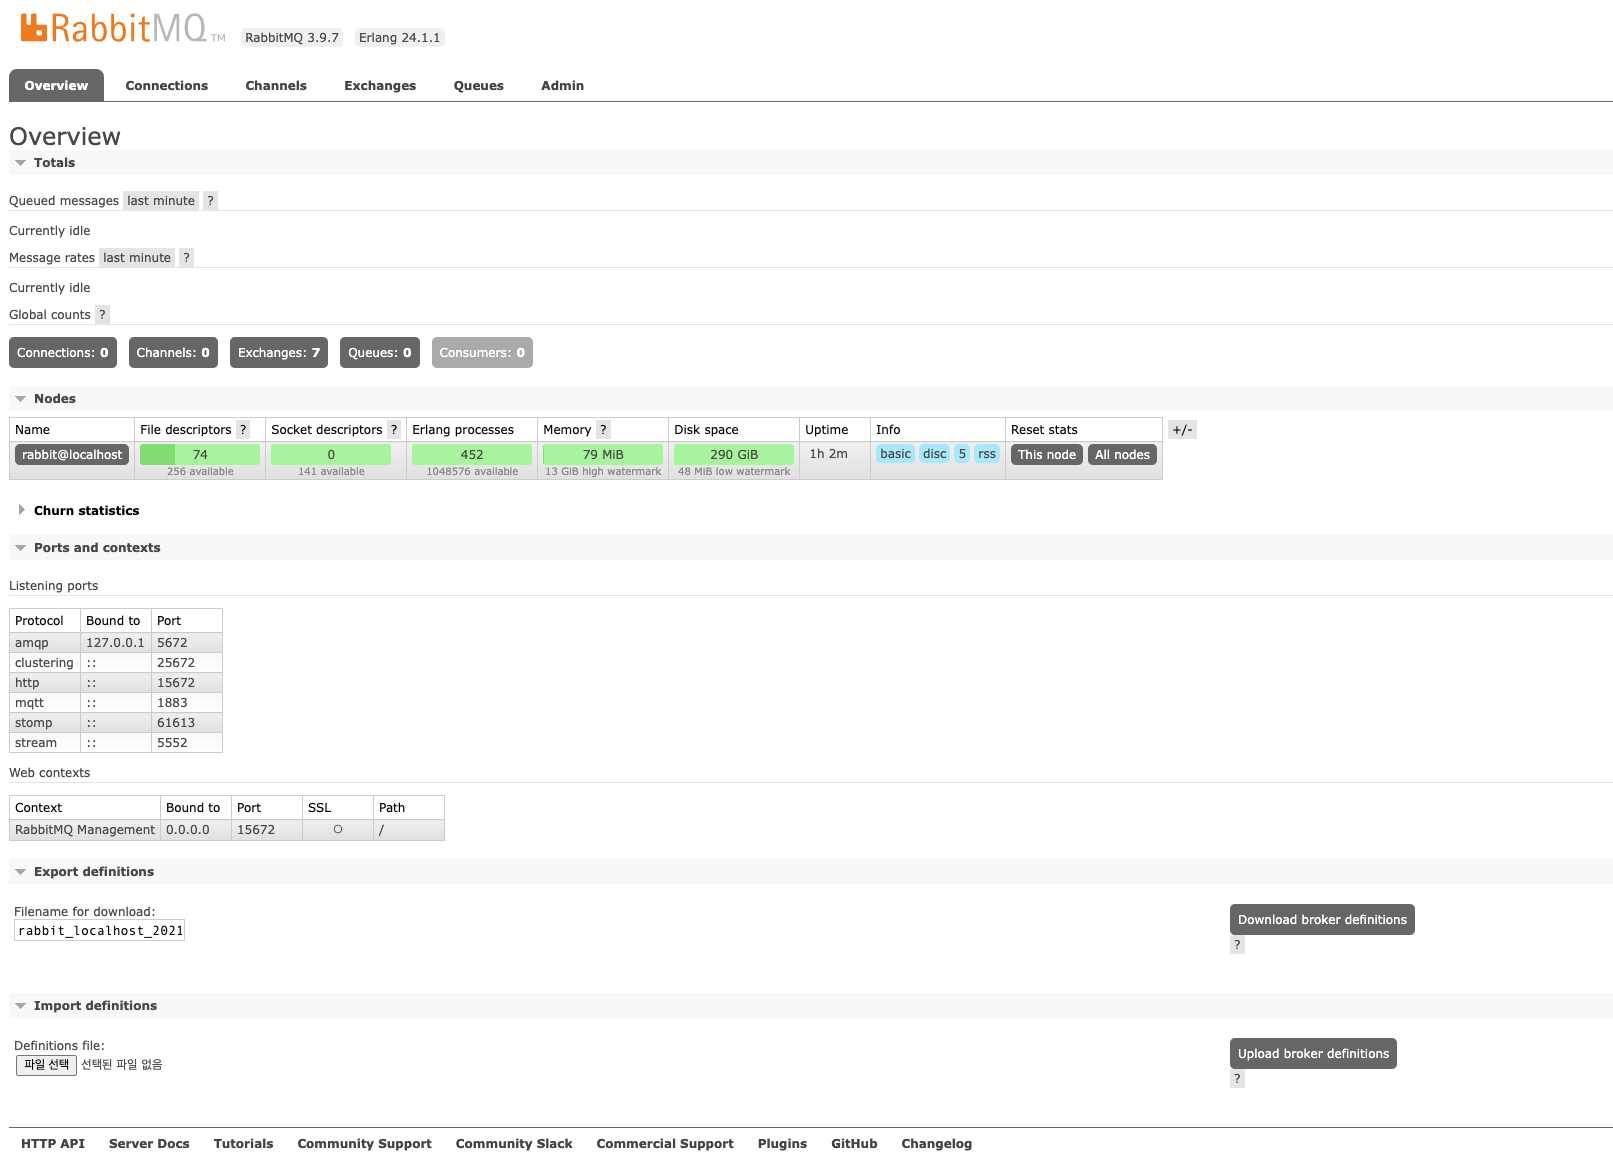
아직까지는 연동된 Connection과 Channel, Queue, Consumer 가 없는 것을 확인할 수 있으며 Exchange는 디폴트 7개만 있는 것을 확인할 수 있습니다.
2. Spring Initializr를 통해 프로젝트 생성
Pre-initialized project 또는 IDE의 Spring Initializr를 통해 아래 설정으로 프로젝트를 생성합니다.
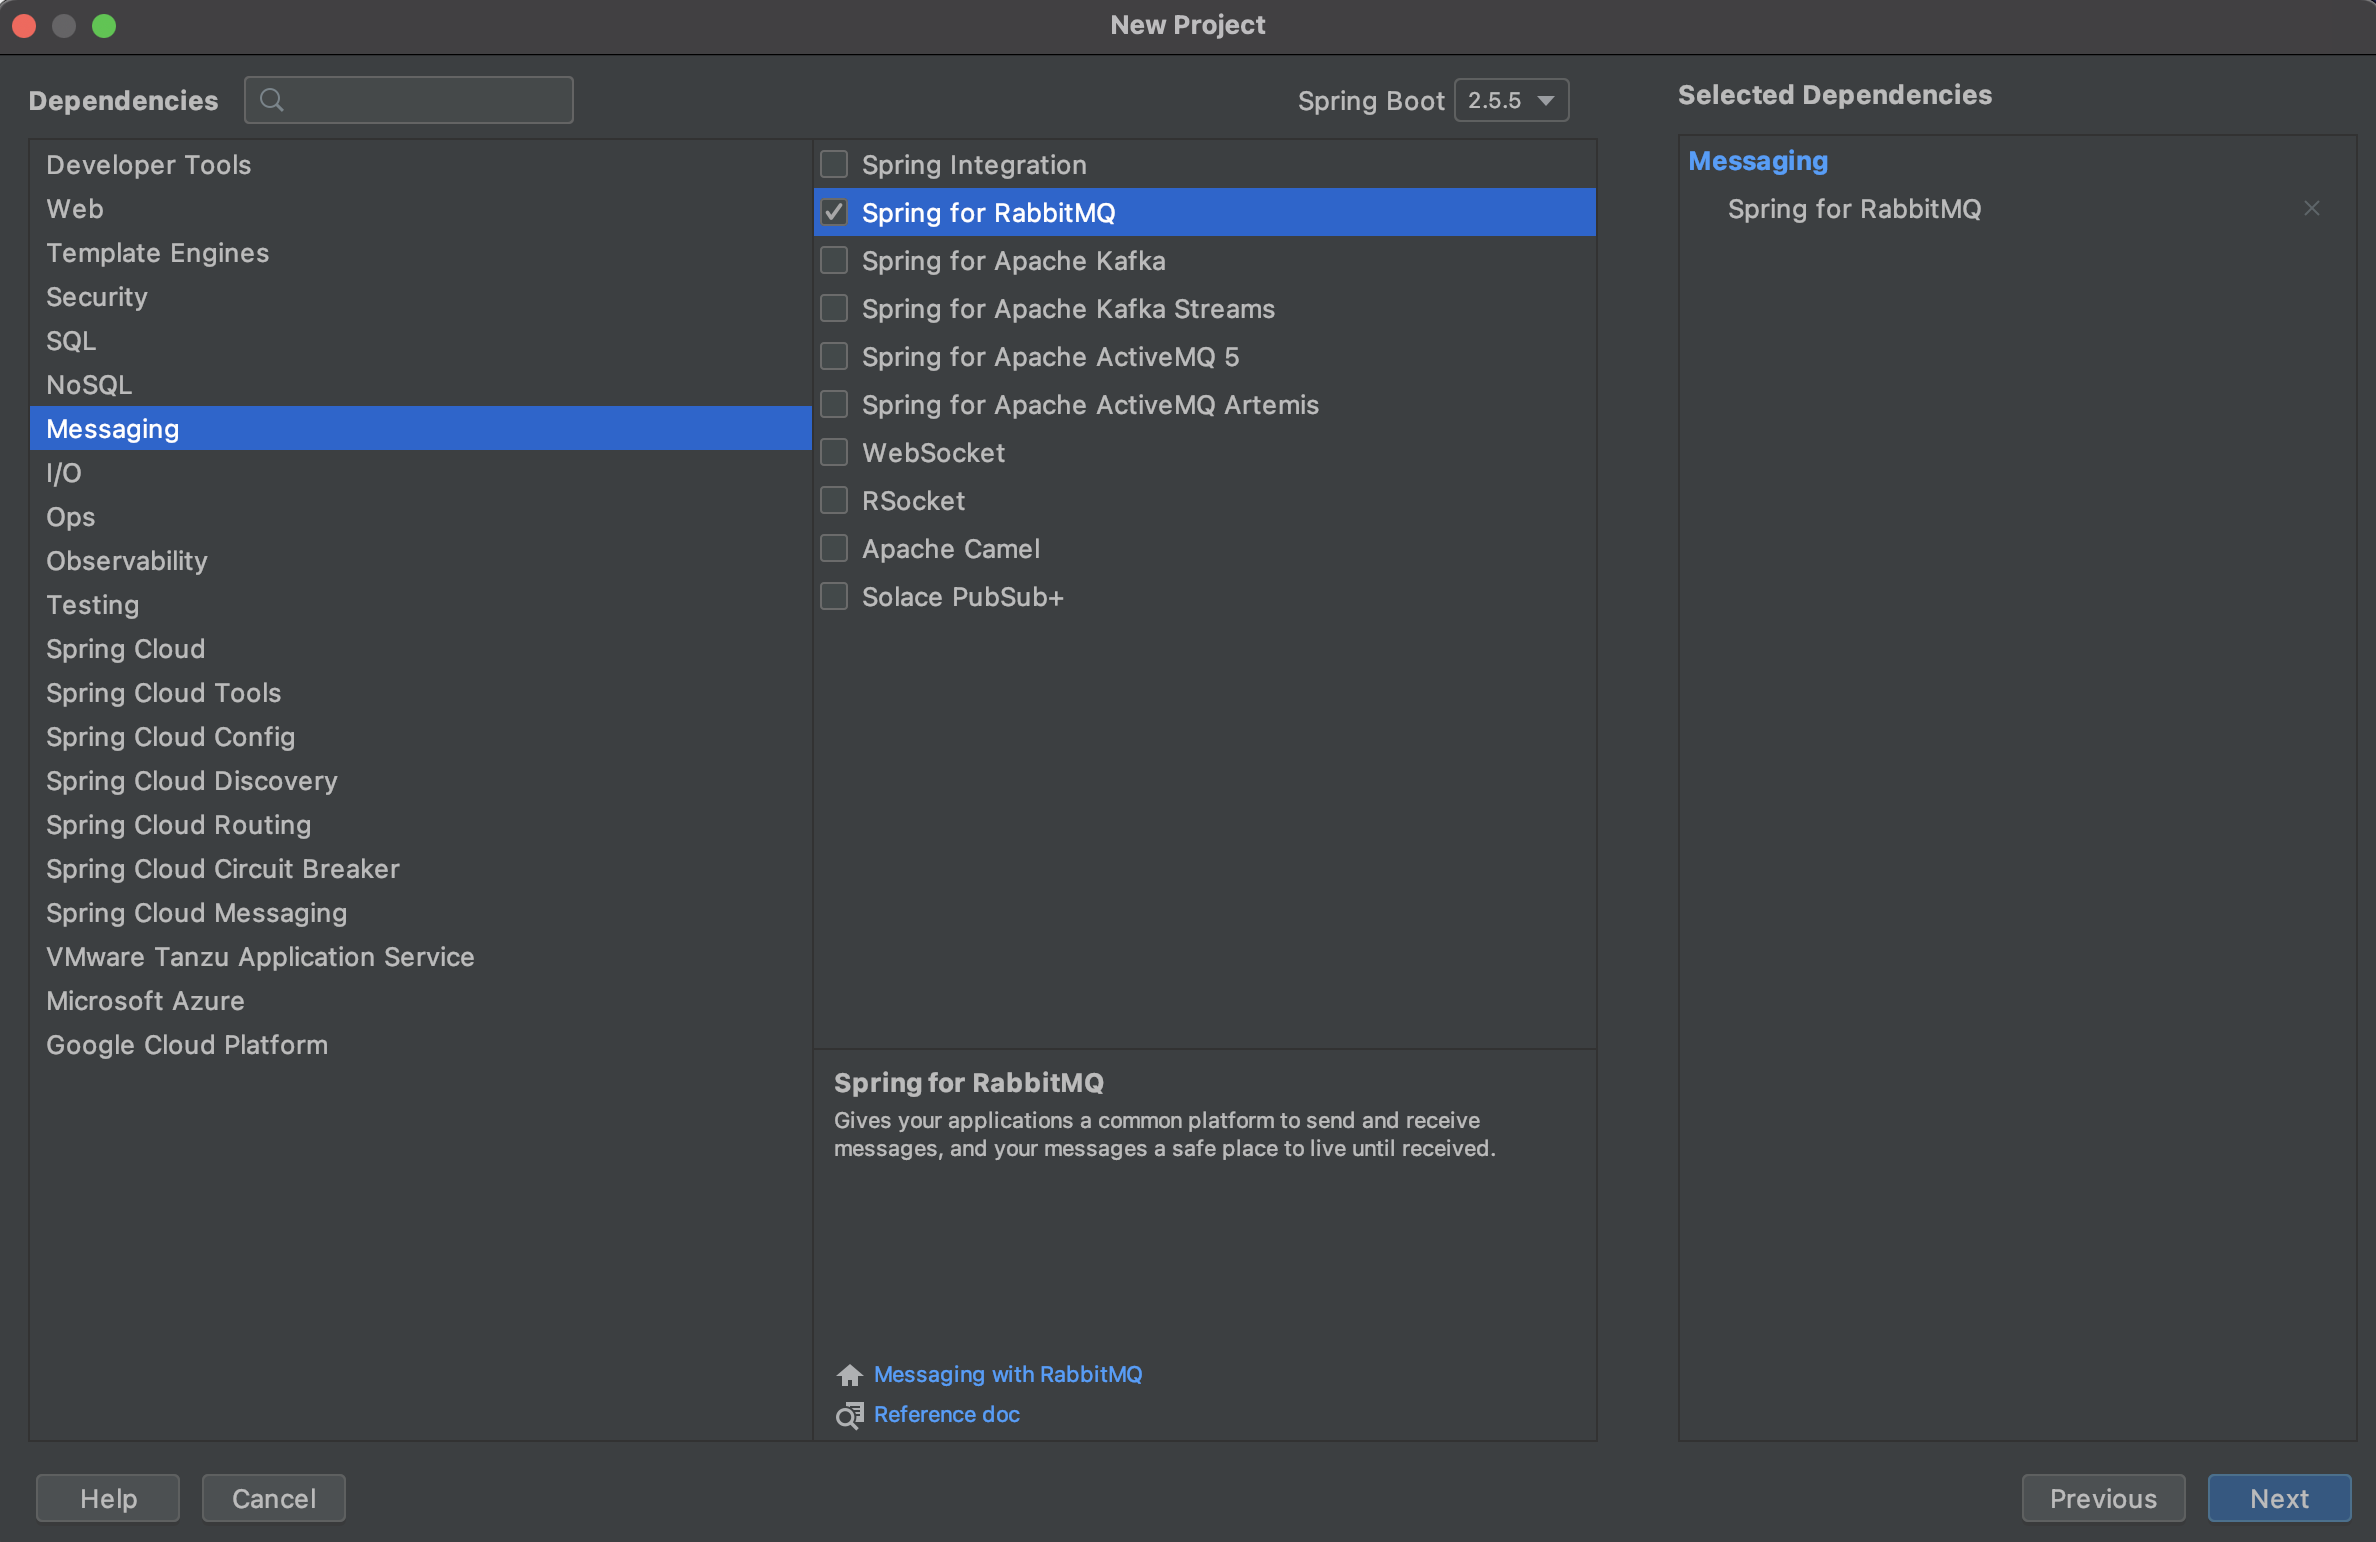
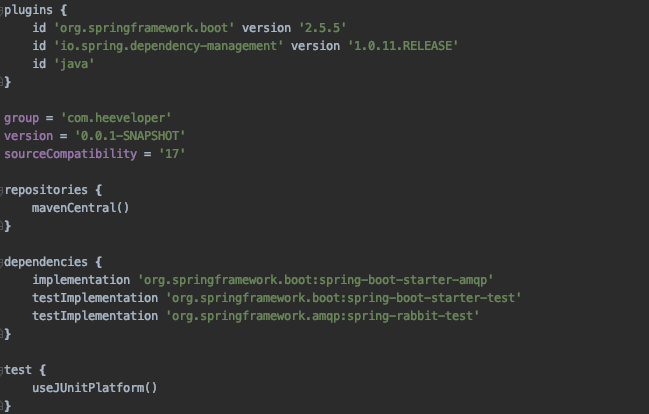
생성된 프로젝트의 속성은 다음과 같습니다.
3. RabbitMQ Message Receiver 구현
메시징 기반 애플리케이션에서 발행된 메세지들을 받을 Receiver가 필요합니다.
import java.util.concurrent.CountDownLatch;
import org.springframework.stereotype.Component;

@Component
public class Receiver {

  private CountDownLatch latch = new CountDownLatch(1);

  public void receiveMessage(String message) {
    System.out.println("Received <" + message + ">");
    latch.countDown();
  }

  public CountDownLatch getLatch() {
    return latch;
  }
}
Reveiver는 메세지를 받아주는 메서드로 정의한 POJO class이며 명칭은 마음대로 정할 수 있습니다.
편의상 이 POJO는
CountDownLatch를 갖는데, 이는 메세지를 받았다는 신호를 줍니다. production 환경에서는 구현할 필요가 없습니다.
4. Listener 등록 및 Message 전송
Spring AMQP의 RabbitMQ Template은 RabbitMQ와 메세지를 주고 받는데 필요한 모든 것을 제공하지만, 다음의 경우는 직접 설정해야 합니다.
- Message Listener Container
- Queue, Exchange 정의 및 Binding
- Listener를 테스트하기 위해 메세지를 전송하는 Component
Spring Boot는 자동으로 Connection Factory와 RabbitTemplate를 생성하여, 작성해야 할 코드양을 줄여줍니다.
아래 Container Class에서 메세지를 수신할 message llistener container와 함께 Receiver를 등록합니다. Connection Factory는 이 둘을 구동하여 RabbitMQ 서버에 연결해줍니다.
Container에 queue와 receiver와 연동된 listenerAdapter 그리고 RabbitMQ 서버와 연동해주는 connectionFactory를 설정해줍니다.
import org.springframework.amqp.core.Binding;
import org.springframework.amqp.core.BindingBuilder;
import org.springframework.amqp.core.Queue;
import org.springframework.amqp.core.TopicExchange;
import org.springframework.amqp.rabbit.connection.ConnectionFactory;
import org.springframework.amqp.rabbit.listener.SimpleMessageListenerContainer;
import org.springframework.amqp.rabbit.listener.adapter.MessageListenerAdapter;
import org.springframework.boot.SpringApplication;
import org.springframework.boot.autoconfigure.SpringBootApplication;
import org.springframework.context.annotation.Bean;

@SpringBootApplication
public class MessagingRabbitmqApplication {

  static final String topicExchangeName = "spring-boot-exchange";

  static final String queueName = "spring-boot";

  // AMQP 큐 생성
  @Bean
  Queue queue() {
    return new Queue(queueName, false);
  }

  // Topic Exchnage 생성
  @Bean
  TopicExchange exchange() {
    return new TopicExchange(topicExchangeName);
  }

  // 생성된 queue와 topic exchnage를 "foo.bar.*" Routing Key로 연동
  @Bean
  Binding binding(Queue queue, TopicExchange exchange) {
    return BindingBuilder.bind(queue).to(exchange).with("foo.bar.#");
  }

  @Bean
  SimpleMessageListenerContainer container(ConnectionFactory connectionFactory,
      MessageListenerAdapter listenerAdapter) {
    SimpleMessageListenerContainer container = new SimpleMessageListenerContainer();
    container.setConnectionFactory(connectionFactory);
    container.setQueueNames(queueName);
    container.setMessageListener(listenerAdapter);
    return container;
  }

  @Bean
  MessageListenerAdapter listenerAdapter(Receiver receiver) {
    return new MessageListenerAdapter(receiver, "receiveMessage");
  }

  public static void main(String[] args) throws InterruptedException {
    SpringApplication.run(MessagingRabbitmqApplication.class, args).close();
  }

}
listenerAdapter() 빈은 container() 로 정의된 컨테이너의 Message Listener로 등록되어, spring-boot 큐로 오는 메세지들을 감시합니다. Receiver 클래스는 POJO 이기 때문에 MessageListenerAdapter 로 래핑되어 receiveMessage() 를 수행합니다.
@SpringBootApplication은 다음과 같은 어노테이션들을 포함하고 있습니다.
@Configuration: 해당 class 파일을 application context의 빈으로 등록합니다.@EnableAutoConfiguration: 스프링부트에게 classpath 및 그 외 설정들에 기반한 bean들을 추가하도록 지시합니다. 예를 들어 classpath에spring-mvc가 있는 경우, 해당 어노테이션은 애플리케이션이 웹 애플리케이션으로 표시하고,DispatcherServlet을 설정하는 것과 설정을 활성화합니다.@ComponentScan: Spring이com/example패키지에서 다른 components 및 configurations 및 services를 조회하여 controller를 찾도록 합니다.
JMS 큐와 AMQP 큐는 다른 의미를 갖는데, 예를 들어 JMS는 큐에 있는 메세지를 한 명의 Consuer에게 보내고 AMQP 큐는 동일한 작업을 수행하지만 AMQP Producer는 메세지를 바로 큐에 보내지 않고 Exchange(어느 큐로 보낼지 판단하는 역할)에게 보냅니다.
Message Listener Container와 Receiver 빈은 메세지를 수신할 때 필요한 것이고, 메세지를 보내기 위해서 따로 RabbitTemplate을 사용해 구현해줍니다.
5. 메세지 전송
아래 CommandLineRunner 를 통해 테스트 메세지를 보내고 10초 Latch 후 종료합니다.
import java.util.concurrent.TimeUnit;

import org.springframework.amqp.rabbit.core.RabbitTemplate;
import org.springframework.boot.CommandLineRunner;
import org.springframework.stereotype.Component;

@Component
public class Runner implements CommandLineRunner {

  private final RabbitTemplate rabbitTemplate;
  private final Receiver receiver;

  public Runner(Receiver receiver, RabbitTemplate rabbitTemplate) {
    this.receiver = receiver;
    this.rabbitTemplate = rabbitTemplate;
  }

  @Override
  public void run(String... args) throws Exception {
    System.out.println("Sending message...");
    rabbitTemplate.convertAndSend(MessagingRabbitmqApplication.topicExchangeName, "foo.bar.baz", "Hello from RabbitMQ!");
    receiver.getLatch().await(10000, TimeUnit.MILLISECONDS);
  }

}
6. 애플리케이션 실행 구조
- 메인 메서드 실행
- Message Listener Container 실행 후 메세지 수신 시작
- Runner 빈 자동으로 실행되어 RabbitTemplate을 이용하여 메세지 발송
- Exchanger 통해서
spring-boot큐에 추가 - Listener를 통해 Consumer에게 메세지 전달
7. 결과
Exchange와 Queue가 추가된 모습
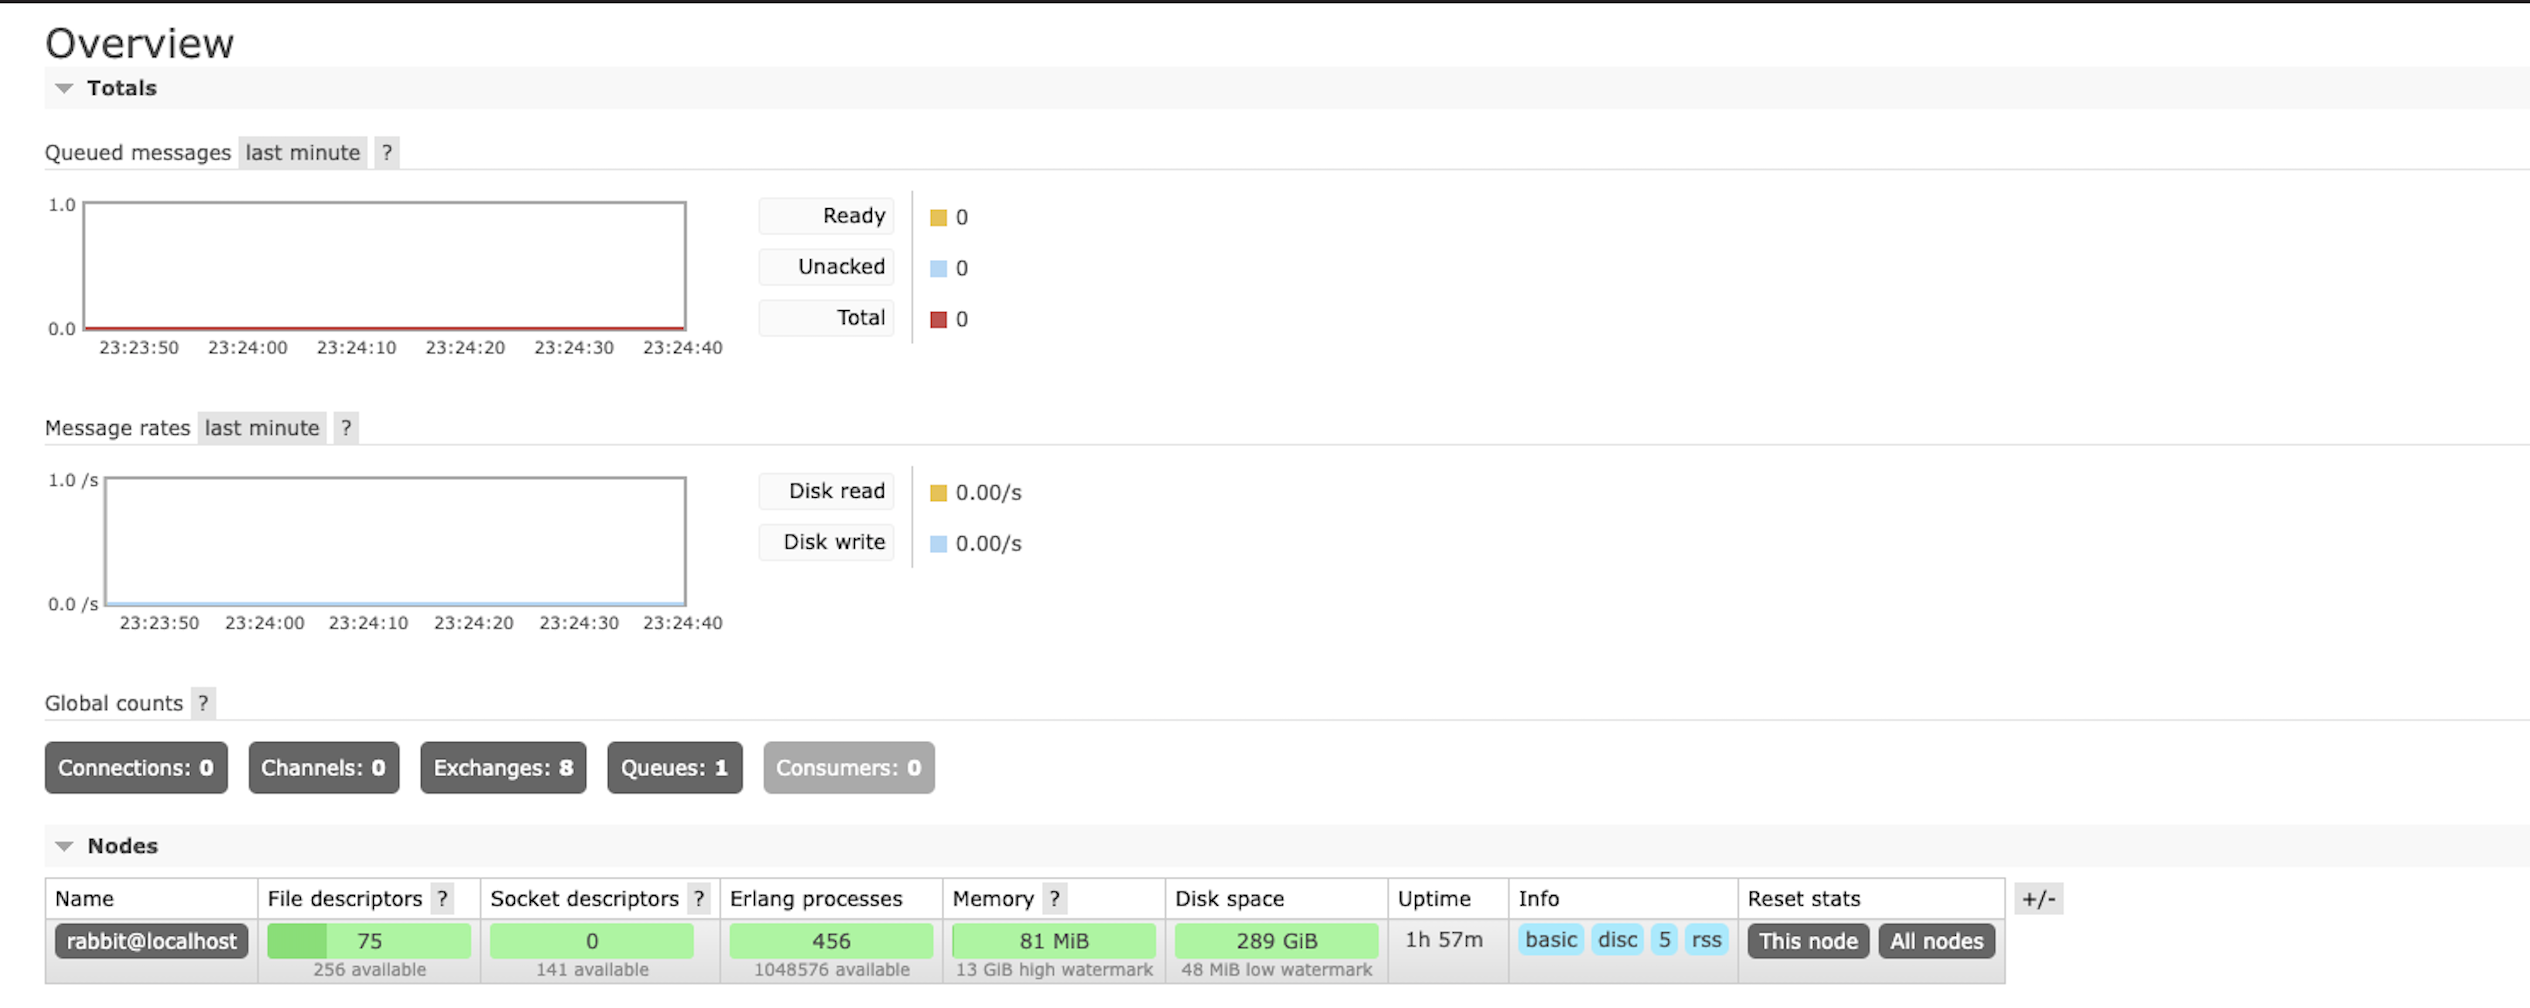
추가된 Exchange
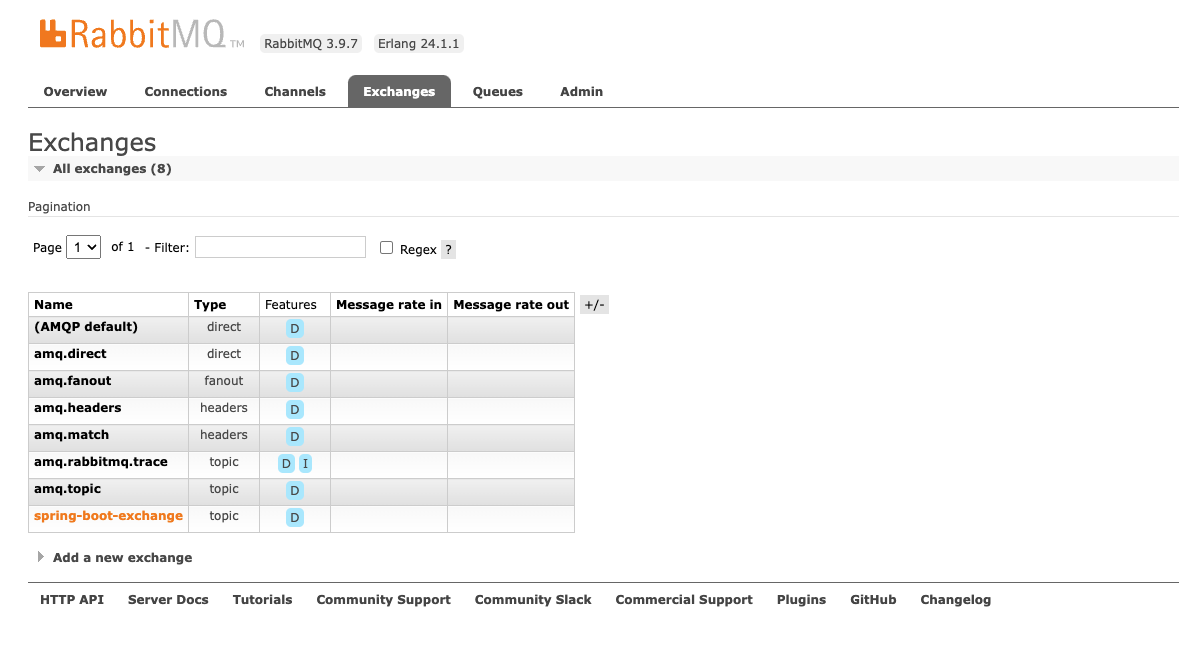
추가된 Queue

SUCCESS
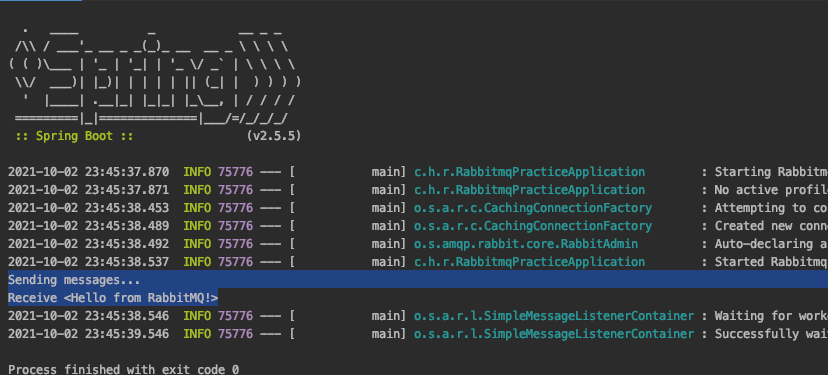
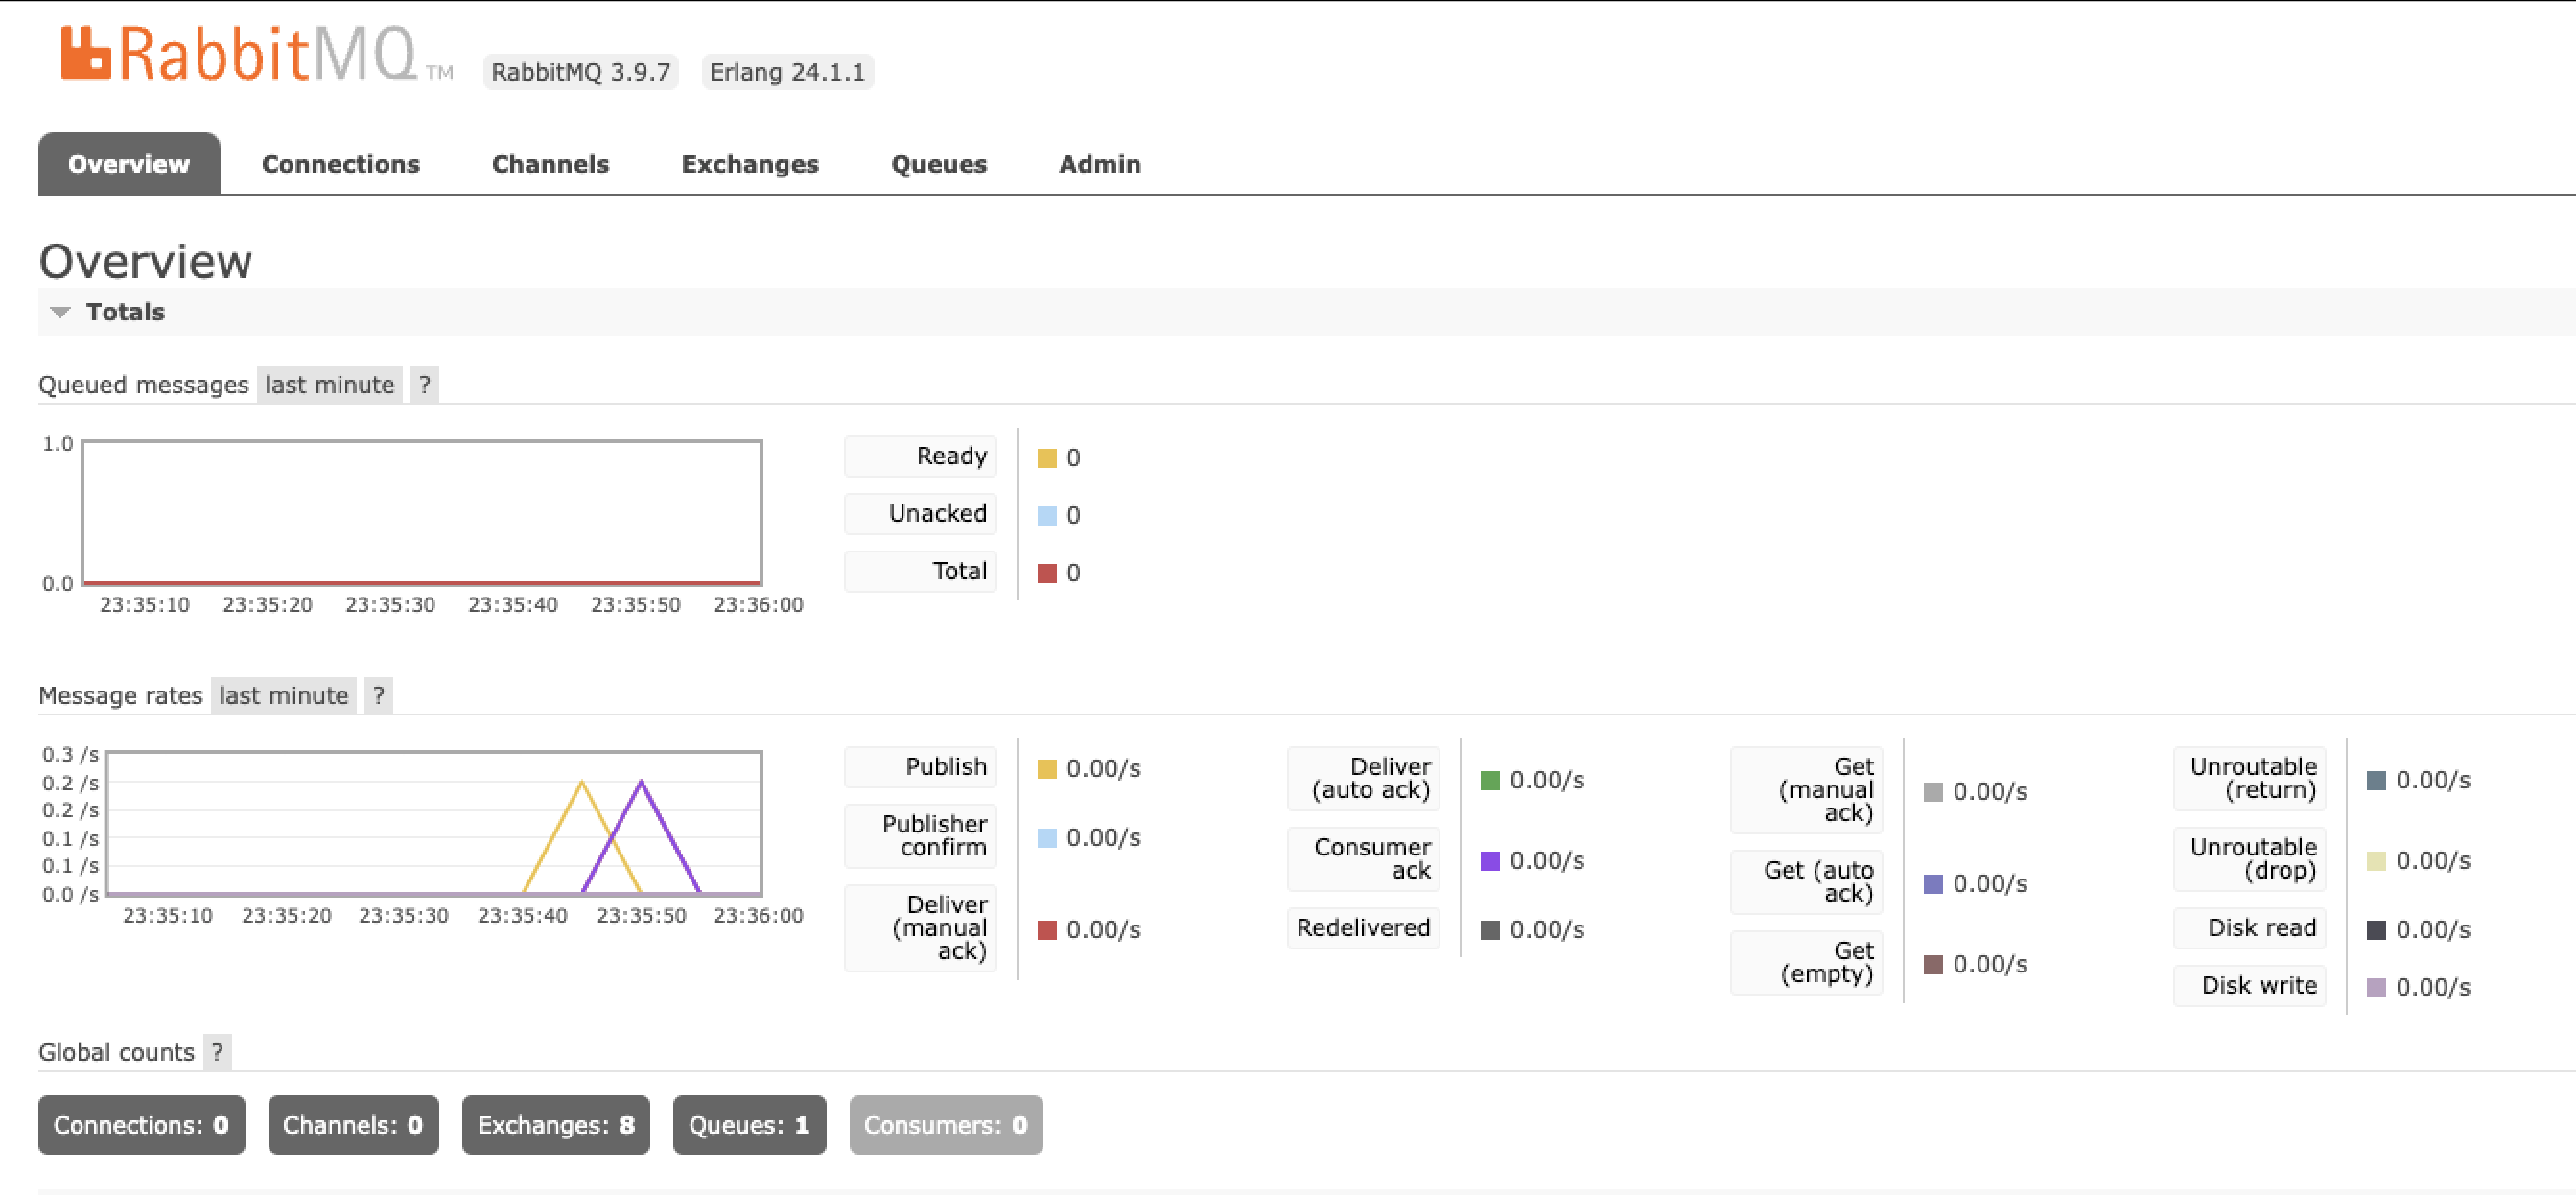
발송 및 수신 로그가 정상적으로 출력되고, Message Rate에 Publish 와 Consumer Ack 가 출력되는 것을 확인할 수 있습니다.
FAIL
의도적으로 발송하는 메세지의 routing key를 다른 값으로 설정하여 Consumer에게 전달되지 않은 경우입니다.
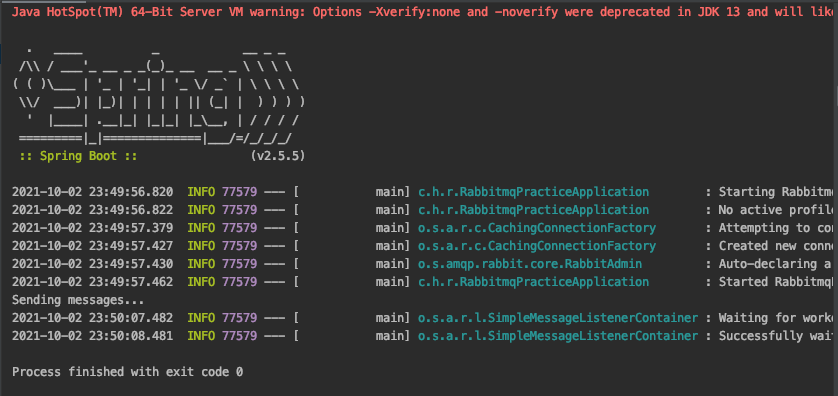

발송된 로그 및 그래프에서 Publish 만 확인할 수 있습니다.
즉, 등록된 topic exchnage의 규칙에 부합하지 않아 바인딩되어 있는 큐로 전달되지 않았음을 확인할 수 있습니다.
위와 같이 RabbitMQ의 기본적인 동작에 대해 직접 확인하였습니다.
결과를 보면서 의문인 부분은 올바르게 전달된 메세지가 Queue messages 그래프에 나타나지 않는데, 메세지가 적다보니 체크가 되지 않는 것인지는 확인해봐야할 것 같습니다.